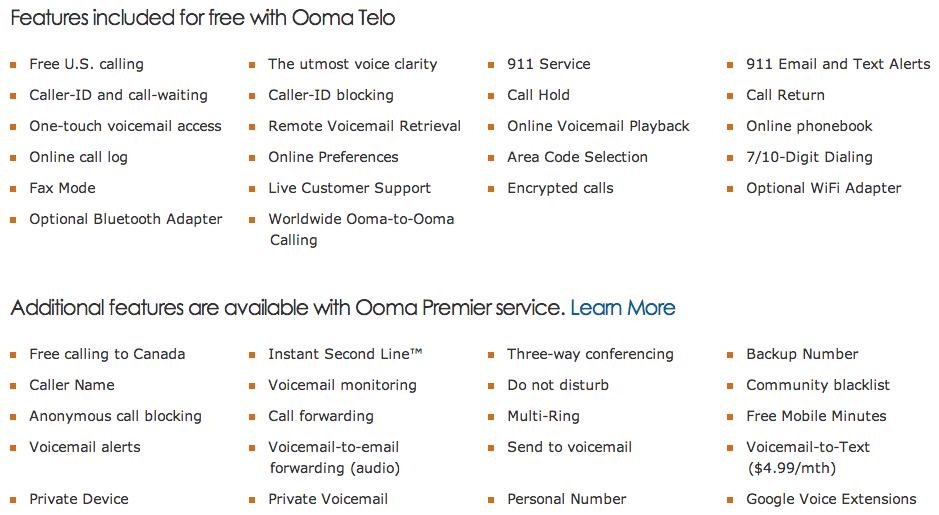
Congratulations on your new phone service through Ooma! You made a wonderful choice that will save you hundreds of dollars each year. In fact, the only required cost to you is the Telo device and the monthly government taxes & fees which usually vary between $5-$10 per month depending on your state and local laws. We believe that you will love your Ooma, the excellent flexibility, the features Ooma provides and their award winning customer support.
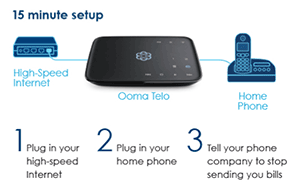
Ooma Setup Is Easy As 1-2-3
The next step for you is to get the original Ooma Adapter or Updated Telo 2 Adapter VoIP phone system up and running by doing the required installation, registration and activation. You’re in luck because it’s quite easy, just follow our setup guide, which is similar to the manual that Ooma provides with each device. It will take you through the process step-by-step. Most users can bet setup in under 15 minutes!
Online Activation Of Your Telo
Online activation is super simple and as long as you have a valid U.S. or Canadian address, the only things you’ll need for this are:
- Your Ooma “Telo” Device
- A valid U.S. or Canadian Credit Card
The process is simple and there is no need to worry – you won’t find any hidden fees from Ooma! They only ask for your payment information to cover your monthly local taxes & fees and in the event you voluntarily choose to upgrade to their paid service (Ooma Premier service) from them now or in the future.
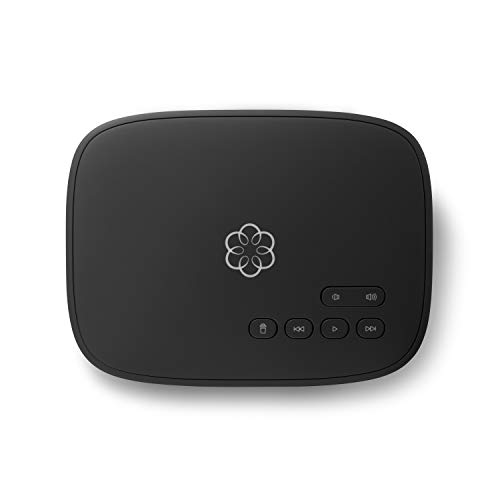
Once you have the contents of the box you will want to take out the larger square black box that is called the “Ooma Telo”. On the bottom of the box you’ll see a seven digit number in the lower right labeled the “Activation Code.”
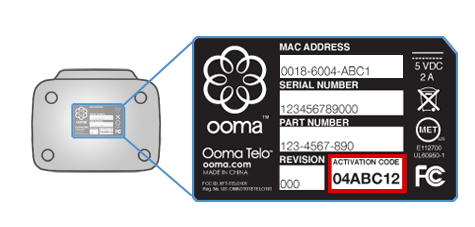
The Telo Activation Code Is Very Easy To Find
Then, just navigate online to ooma.com/activate. Once you’re there, the “Activation Wizard” will take you through a step-by-step on how to:
Step 1: Select A Phone Number – This is really straightforward if you’re selecting a new number. However, if you’re looking to port your current number, there is a one-time fee of $39.99—though it’s free if you opt to sign up for Ooma Premier. Premier includes a second line and a bunch of other bells and whistles that are pretty cool, and goes for only $9.99/month.
Note: If you’re porting your current number, you DO NOT want to cancel your current service with the number you’re trying to transfer over until it’s fully transferred to and working with Ooma. Otherwise you may lose that number. Activating that number can take three to four weeks as well, so if you’re going that route, feel free to bookmark this page so we can finish up later.
Step 2: Register Your 911 Address – Just enter the address where you will be making calls.
Step 3: Enter Your Billing Information – This is where you add your payment information to cover the monthly state & local taxes.
Step 4: Create Your Personal MyOoma Account – You will need this account to monitor and make any changes to your services or if you ever need to contact customer support this is the way to do it.
You should receive an email you right away once the Activation Wizard shows that you’re finished on the screen. If you’ve got the email, pat yourself on the back and move on to the next step.
Wired Setup Steps
Alright, if you’ve gotten that confirmation email, it’s time to get everything out of the box and set it up! You will need everything in your Telo box and your existing phone on hand or you can purchase an Ooma handset.
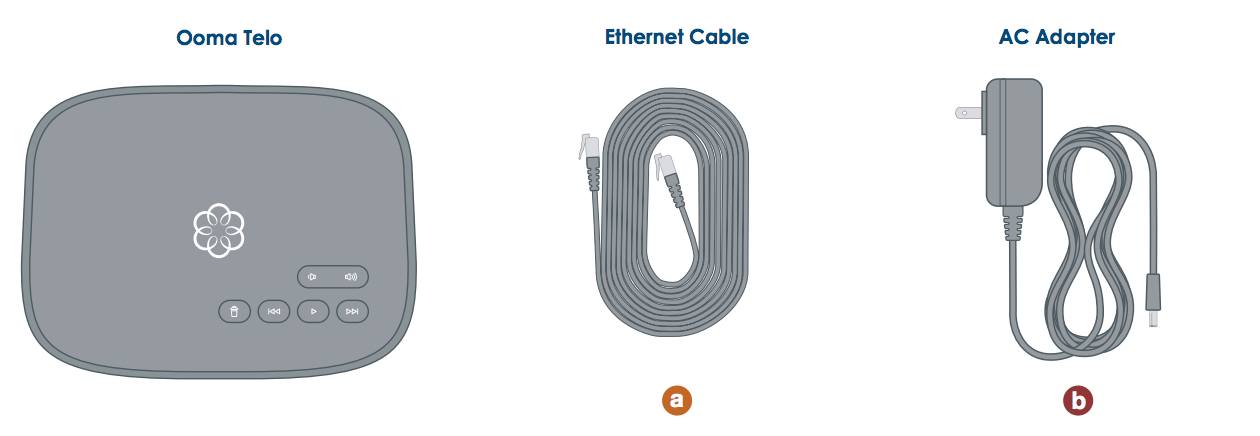
Step 1: Locate The Contents Of Your Box
-
- Your Ooma “Telo”
- An Ethernet (or CAT5) Cable
- A power cord (AC Adapter)
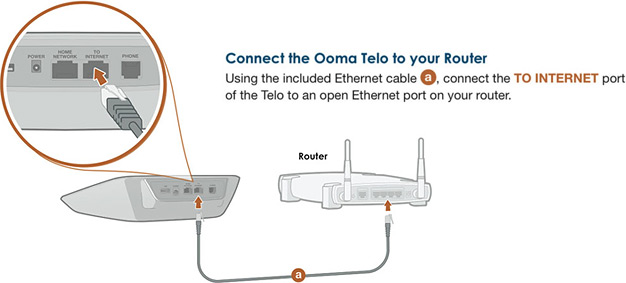
Step 2: Hook the Ethernet cable to both the Telo device and your router
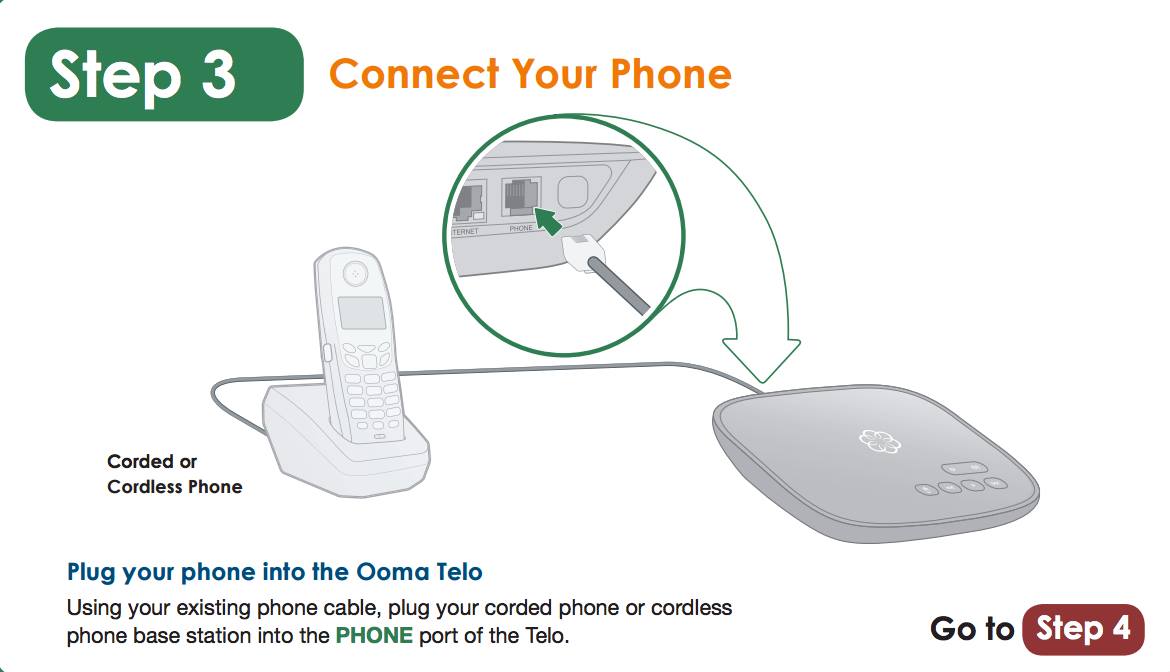
Step 3: Hook the phone cable from your existing phone into both the Telo device and your phone
Step 4: Use the AC Adapter to plug the Ooma Telo into an electric outlet and turn it on
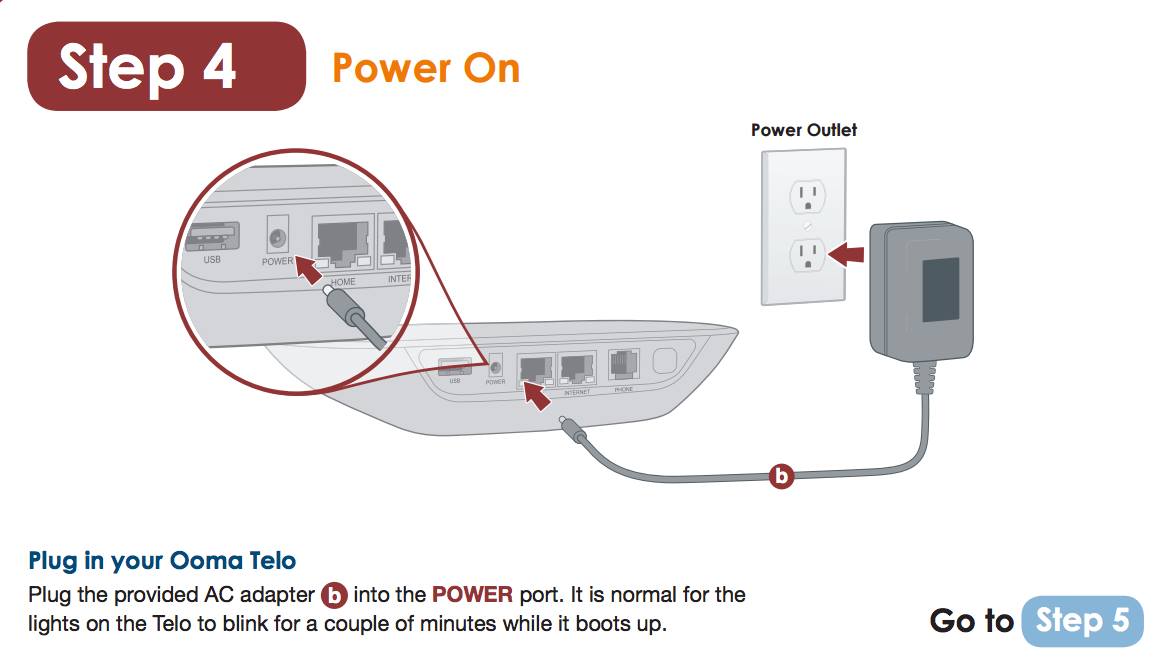
Note: After turning the device on the blue lights on the Telo will start blinking. It will take the Telo a few minutes to boot up and could take as long as 10 minutes if the Telo needs to do software updates. This happens automatically and the lights will begin to blink purple while it is updating the software.
Step 5: Once the Telo is done updating the light will stop blinking and be a solid blue. Pick up the phone to and listen for the musical Ooma dialtone to confirm it is ready for calling
Step 6: Begin making your free calls
Various Options For Wireless Setup
The steps listed above are recommended as the easiest setup but if your router/modem happens to be in an inconvenient place in your home like it is in mine – not to worry – you can get a wireless + bluetooth adapter direct from the company or get the “Ooma Telo Air” which includes the wireless + bluetooth adapter. These are the same thing and will allow you to put your Telo anywhere in your house. The Telo Air is exactly the same as the standard device but includes a wireless + bluetooth adapter.
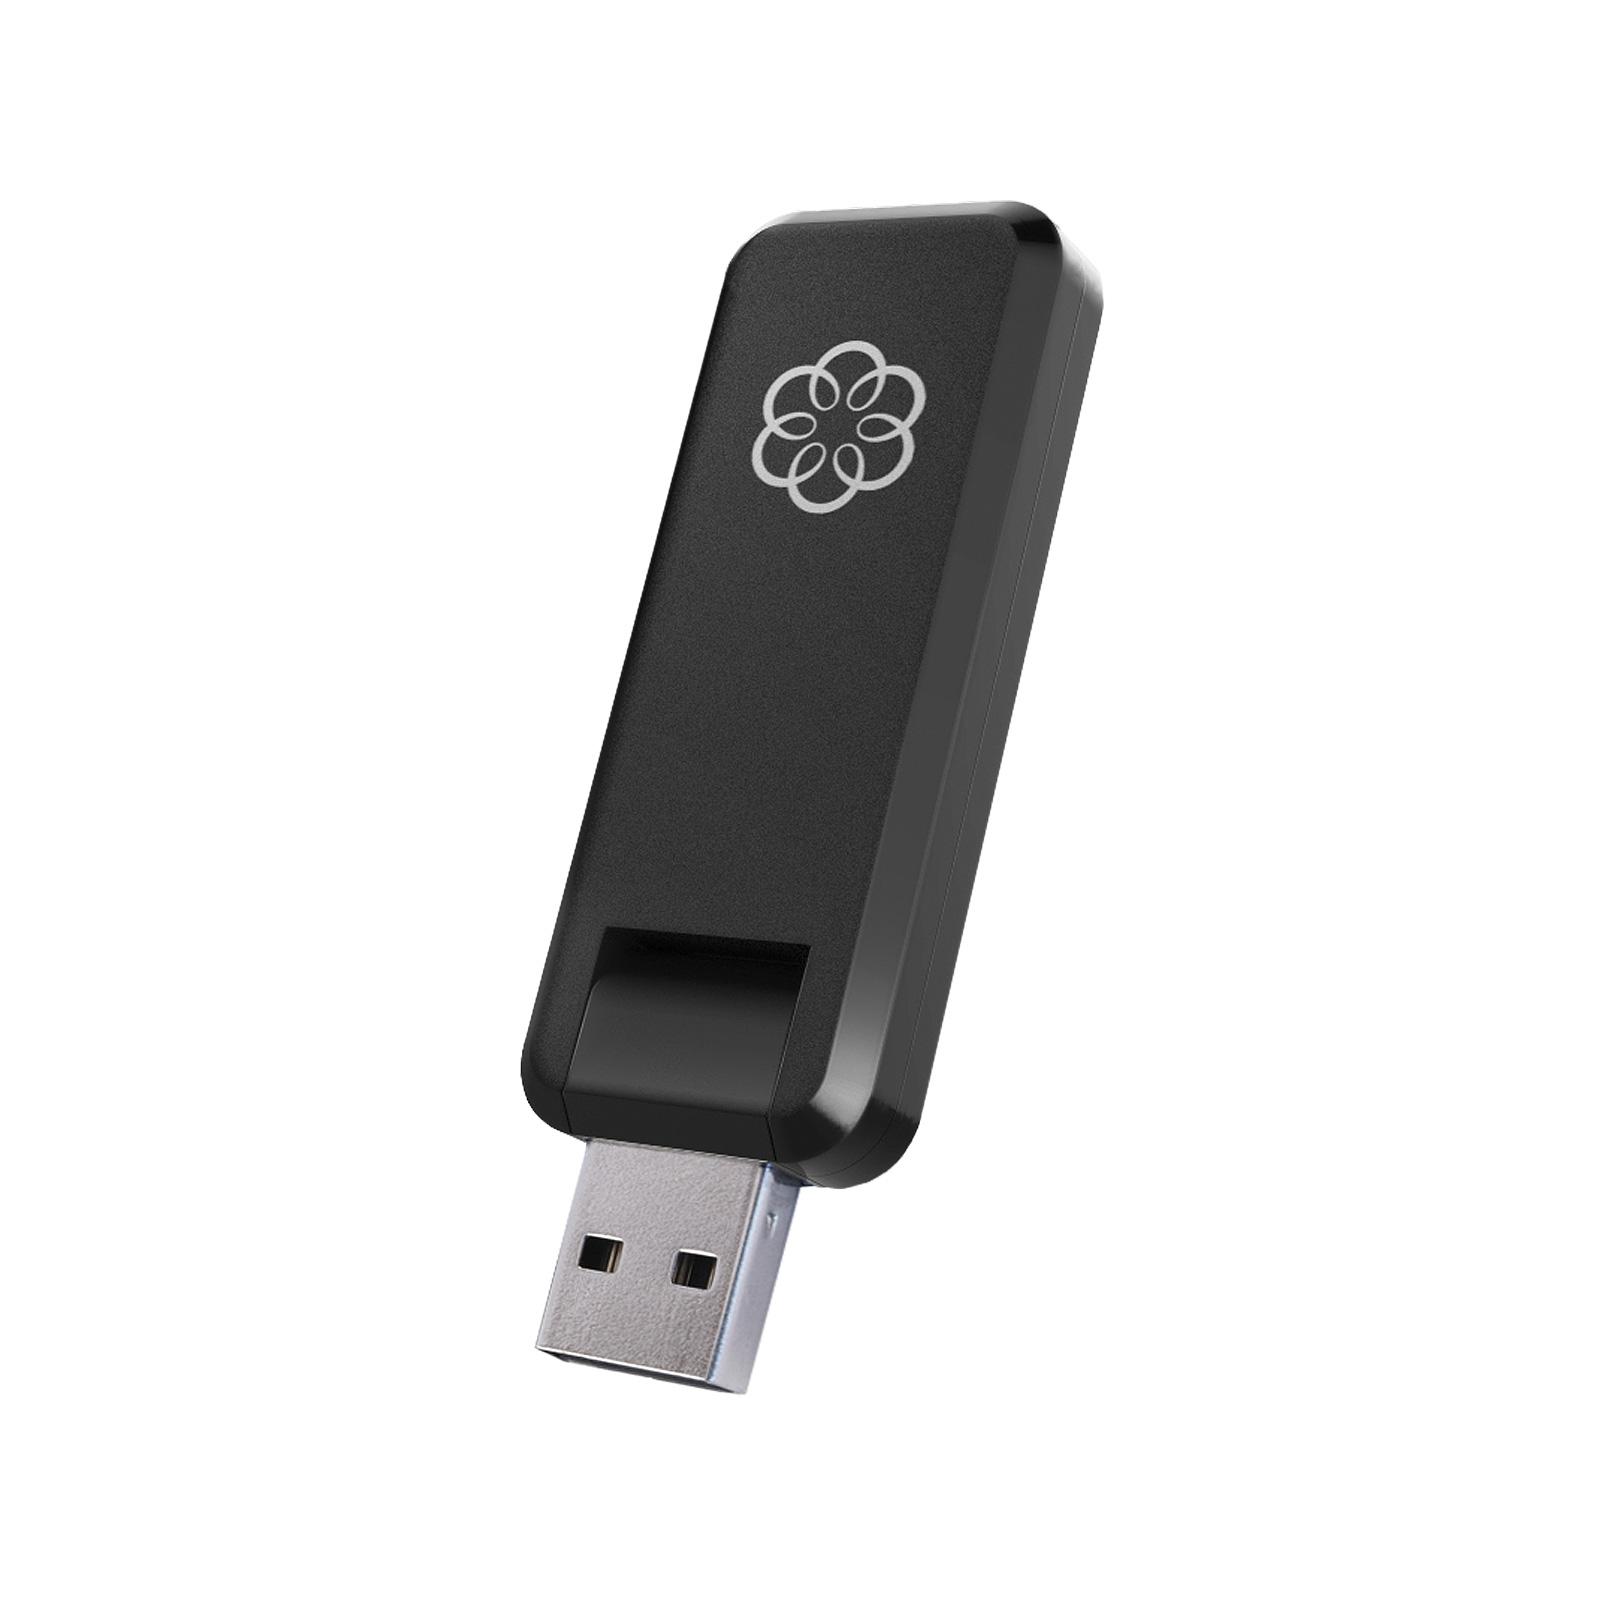
Ooma Wireless + Bluetooth adapter
The Telo Air it will cost you $149.98 (an extra $49.99 over the standard Telo) or if already have a Telo you can just get the wireless + bluetooth adapter for $49.99. You can try moving your modem to a more convenient place if you want to save the $49.99 but we recommend just getting the wireless adapter.
If you don’t need wireless syncing between your home phone and the Telo but want to sync your calls with your cell phone then we recommend getting the “bluetooth adapter” (different from the “wireless + bluetooth adapter”). This little device lets you pair incoming calls to your cell phone if you have one, a big plus these days! This allows you to use the Ooma Mobile App for all of your calls.
Wireless Setup Steps
Here’s how to set up your wireless connection if you decide to go the wireless route:
Step 1: Follow The Activation Steps From Above
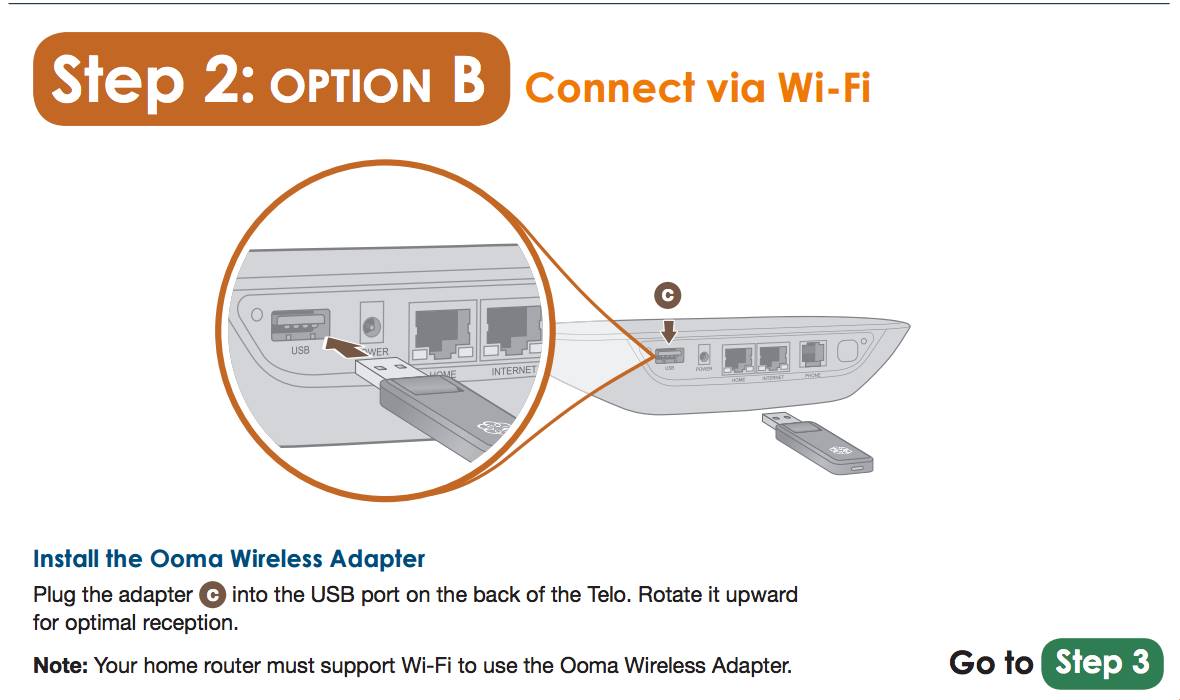
Step 2: Insert Your Wireless + Bluetooth Adapter Into Port C On Your Telo
Step 3: Hook the phone cable from your existing phone into both the Telo device and your phone

Step 4: Use the AC Adapter to plug the Ooma Telo into an electric outlet and turn it on
Note: Once turned on the Telo will go through it’s own boot up process and the blue lights may blink for several minutes.
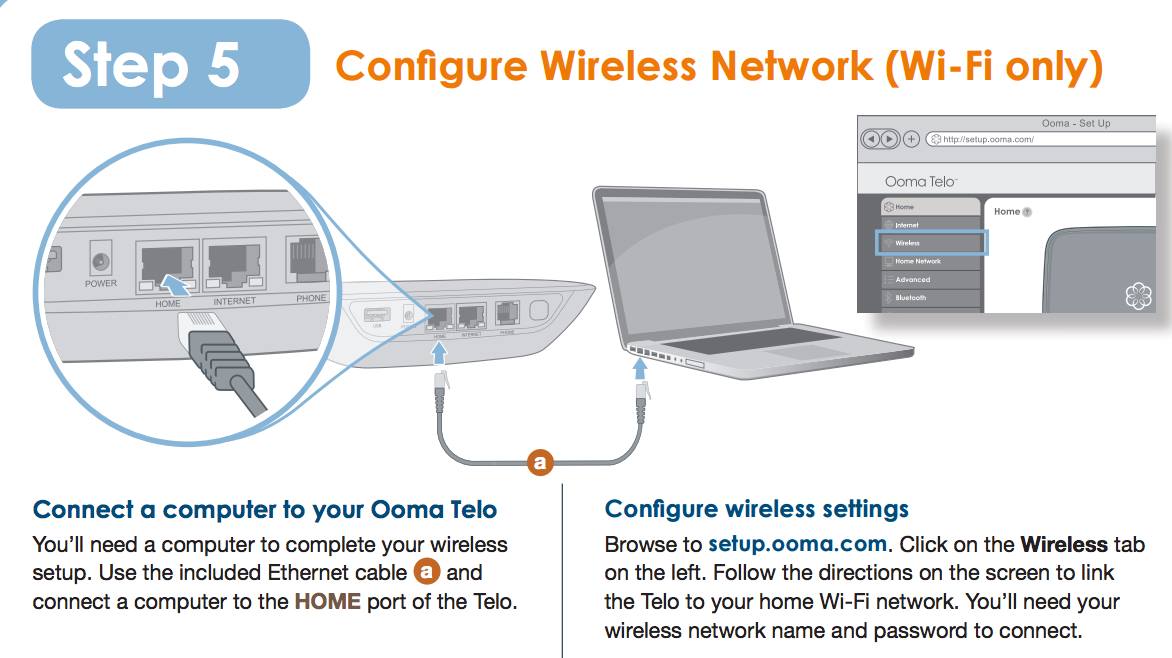
Step 5: Configure your wireless connection. (see installation diagram below) In order to do this you will have to temporarily hook your Telo device to your computer via the Ethernet cable. You’ll need to visit the setup site and click on the ‘wireless’ tab in the left column. Follow the prompts to get your Telo setup with your Wi-Fi connection.
Step 6: If your device needs to do a software update it will start automatically and the lights will begin blinking purple. Once finished the lights will stop blinking and the color will change to blue.
Step 7: Pick up the phone and listen for the musical Ooma dialtone to confirm it is ready for calling
Step 8: Begin making your free calls
Voicemail Setup
To setup your Ooma voicemail you will need to pickup your phone and press the  button on your Telo. This will take you through the setup process which includes setting up your pin (for remote access to voicemails) and recording a personal greeting. The Ooma voicemail setup process is very simple and should only take a few minutes.
If you want to change your pin or greeting you can do so by calling your voicemail and selecting option “2” from the main voicemail menu.
Setup And Troubleshooting FAQs
What if my Ooma has a blinking a red light?
This means that your Telo is not operational. During the boot up process this is normal but it should go away. If it is still blinking red after awhile you will want to check the following:
- Re-check and make sure you activated your device correctly when using the activation code online
- Make sure you did not plug in the device until after proper activation (Unplug the device if you did and then plug it back in to reset it).
- Verify that all cables are plugged in all the way. (To verify that the Internet port is connected properly check that the LED light in the bottom right is green)
- Check that your Internet connection is working properly
- Visit your MyOoma Account and connect your computer to the HOME port
- Try rebooting your Telo, router and/or modem
What if the Ooma Logo is not lit up on my Telo device?
To fix this you should confirm that your Telo is getting power by checking that the AC Adapter is plugged into both an outlet and the back of the device.
What if the voice quality is choppy and breaks up?
The voice quality you get it directly related to the quality and speed of your Internet. To get the best call quality we recommend you use a wired connection (if your Internet connection is suspect you will more than likely have to abandon the wireless setup). By using a wired connection your calls are given priority over someone who may be using the Internet at your home.
What if I don’t hear the musical Ooma dial-tone after setup?
If the blue light is on but you don’t hear a dial-tone verify that the phone cable is hooked up properly on both ends (to the Telo and your phone).
What if my phone isn’t ringing when I receive incoming calls?
Make sure that your Telo is not in “Do Not Disturb” mode. If it is set to this mode the logo will turn purple and all calls will automatically go to voicemail without ringing. To turn this feature off hold the >> button on your device or dial *79 from your phone.
How do I make and receive calls?
This is simple and no different than you do with a regular phone line.
How do I use the call-waiting feature?
To switch in the middle of a phone call press the flash button on your telephone. This will switch you to the incoming call and put the current call on hold. To switch back just press the flash button again.
How do I hide my caller-ID when calling out?
Dial *67 before calling out and it will hide your phone number to the person you are calling.
How do I setup international calling?
To make international calls you will either need a paid calling plan that includes international calling or will have to deposit prepaid credits into your MyOoma Account. Once you deposit money you can initiate an international call by dialing 011 before the number you are trying to call.
How do I setup my device to make calls to 411?
411 calls require a prepaid balance because they are not free. Simply deposit money into your account like you would for international calling.
Final Thoughts On The Ooma Setup Process
Overall the setup of this VoIP service can seem confusing because there are several options when setting it up but in reality it is very simple once you decide which one is best suited for your situation. The company provides clear and concise instructions along with incredible support if you are having any troubleshooting issue. Ooma phone service provides incredible value for your money and we don’t see how you can go wrong if you choose it.